


This is a quick step-by-step guide for installing opencv
1) Backup your existing opencv build files
2) Install Code::Blocks http://www.codeblocks.org/downloads/26 select current version codeblocks-17.12-setup.exe
3) Install TDM-GCC – making sure the 64-bit version is selected http://tdm-gcc.tdragon.net/download
Note: compiler binary file path will be automatically added to your pc’s path environment.
4) Download the source of OpenCV 4.x.x from https://opencv.org/releases.html as a zip file
Create folders:
C:\opencv\source\
C:\opencv\build\
Unzip the downloaded zip file in the source folder c:\opencv\source\ just created, so you get a folder like C:\opencv\source\opencv-4.x.x
5) Install CMake (uninstall any previous version as major changes made) https://cmake.org/download/
6) Setup to build the binaries:
Open cmake, set source path to C:\opencv\source\opencv-4.x.x and binary path to C:\opencv\build.
Click Configure
Choose CodeBlock—MinGW Makefiles as compiler.
After configuring, options will appear in red, some of these need disabling..
Disable: WITH_MSMF, set ENABLE_PRECOMPILED_HEADERS=OFF, WITH_IPP=OFF WITH_TBB=OFF (these options are for visual studio)
WITH_OPENCL_D3D11_NV=OFF
Note: you can use cmake’s search tool to search for these option eg. enter IPP to disable WITH_IPP etc
Next select/click the Generate button.
A codeblocks project file (opencv.cbp) will be made in C:\opencv\build
7) Now build the binaries:
Open the opencv.cbp file in code::blocks
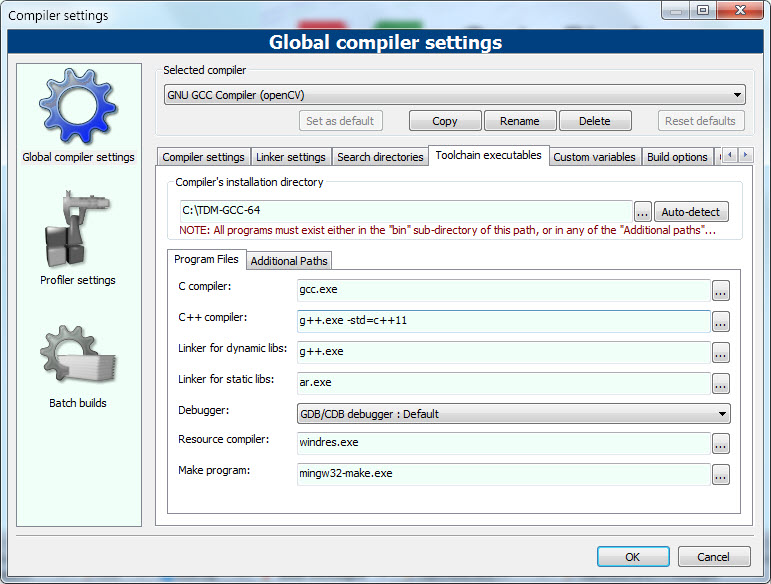
Go to “settings”, choose “compiler” and click “Toolchain executable”. In the “compiler’s installation directory” field choose C:\TDM-GCC-64\bin (binary folder of the TDM compiler installed earlier)
Set the following:
c compile: gcc.exe
c++ compiler: g++.exe (but see note below on handling C++ 11 ISO errors)
Linker for dynamic libs: g++.exe
linker for static libs: ar.exe
Then use Select build > select target > install
Then press the build button to start the building of the binaries – this can take hours to process.
Add C:\opencv\build\install\x64\mingw\bin to the system environment path
8) Now setup up code::blocks to compile an opencv program.
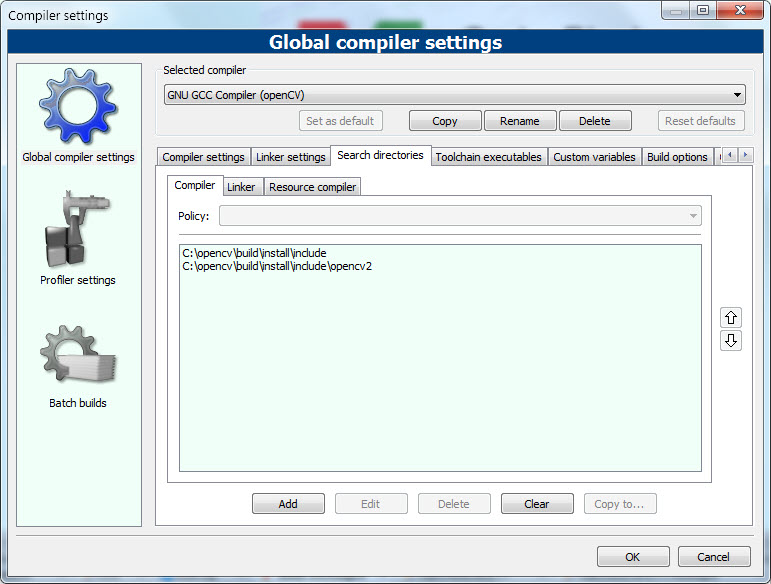
Go to settings -> compiler. Select “search directories” and in the “compiler” tab chose the followings:
C:\opencv\build\install\include
C:\opencv\build\install\include\opencv2
Select “Linker” tab and add “C:\opencv\build\install\x64\mingw\lib”

Go to “Linker Settings” and add all the libraries from “C:\opencv\build\install\x64\mingw\lib” folder so it looks like this..

9) Final configuration – on opencv 4.0.1 you might get a C++ 11 ISO error on compiling, so I recommend just adding this to the C++ compiler option under “Toolchain executable”. In the “compiler’s installation directory”:
c++ compiler: g++.exe -std=c++11
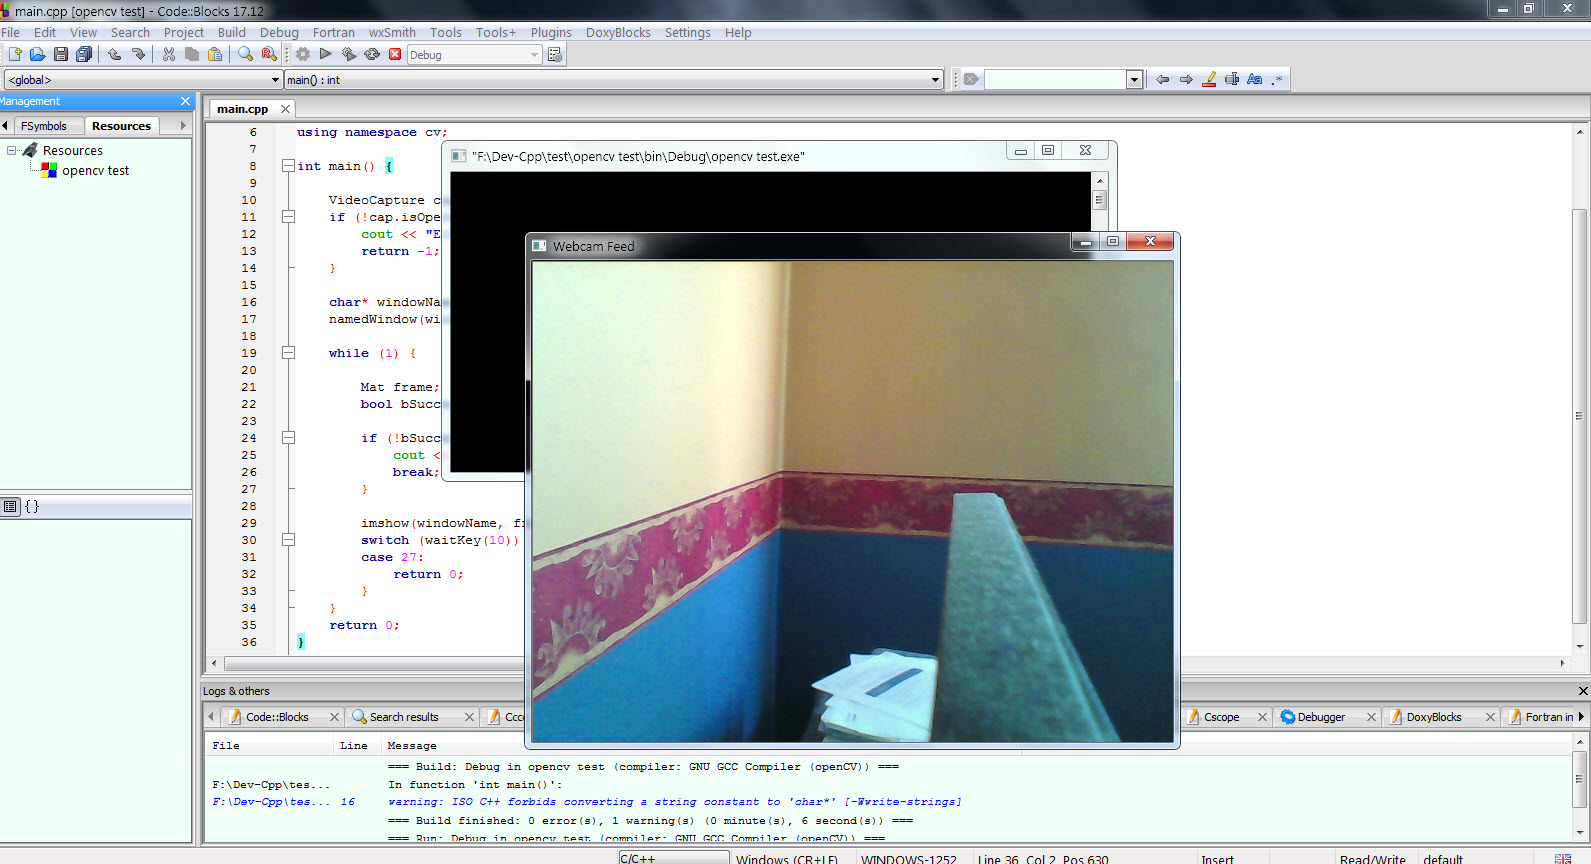
Edit your cpp code (remember to setup as console applications). Then build, then run.. and all been well your script will run on opencv (note many constant values have changed between opencv releases, so highly likely you will need to change your code)
Hope this is useful.